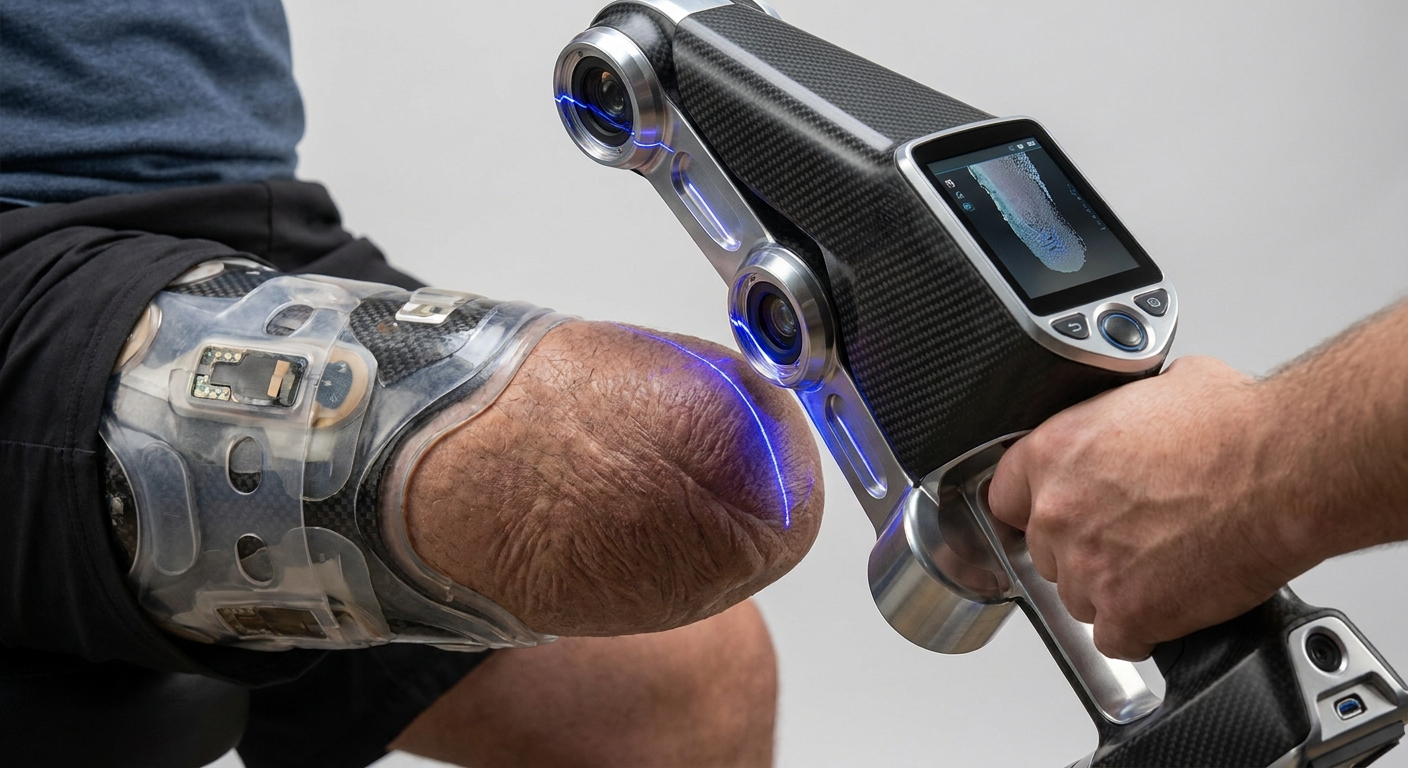
3D scanning gives a prosthetic a custom fit by capturing the exact shape of the residual limb, or of its plaster cast, as a digital model that a prosthetist then modifies in orthotics and prosthetics (O&P) CAD software before the socket is made. The scan alone does not create the fit. The fit comes from a clean, complete capture followed by clinical rectification, a check socket and adjustments with the patient.
The rest of this article covers how to scan a limb so the model is usable, the mistakes that ruin a scan, which capture tools suit which clinic, and what happens to the file after you save it.
What does the scan actually contribute to the fit?
A socket that copies the limb surface exactly is rarely the one that feels right. In the traditional workflow, the prosthetist takes a plaster cast, pours a positive mold, then rectifies it: building up material over bony prominences that cannot take load, and removing material over tissue that can. That rectification is where most of the fit is created.
Scanning replaces the capture step and turns the plaster positive into a digital one. O&P design software such as Canfit is built around this: practitioners start from a 3D patient or cast scan and use templates and overlay tools to make anatomically correct modifications before fabrication. The modifications are still clinical decisions. What the scan controls is whether those decisions are applied to the right geometry.
This is why scan quality matters so much. If the model has a flattened distal end, a doubled wall from movement or the wrong scale, every relief and build-up the designer adds lands in the wrong place.
There are two capture routes, and both are in use:
- Direct limb scan. Fast, clean and non-contact, but it records the limb in its unloaded, relaxed state.
- Scanning a cast. The clinician shapes the tissue with their hands while the plaster sets, so some loading intent is already built into the shape. The cast is then digitised.
Neither is automatically better. Clinics that scan directly rely more on the CAD rectification step to add the tissue shaping that hands used to apply.
How do you scan a residual limb step by step?
The scanning itself takes a minute or two. The preparation decides whether that minute produces a usable file.
- Prepare the surface. Put a thin, matte, light-coloured sock over the limb, or scan bare skin if your protocol allows. Avoid scanning over a glossy silicone liner, which reflects light and breaks up the surface. Mark the landmarks your designer will need, for a transtibial limb typically the patella, tibial crest and fibular head, with a pen that shows in the scan texture.
- Fix the position. Seat or stand the patient with the limb supported proximally and the joint at a repeatable angle. Knee flexion changes the shape of the posterior tissue, so record the position and use the same one at every visit.
- Control the light. Use even, diffuse room light. Strong direct sunlight can wash out phone depth sensors, and hard shadows confuse camera-based reconstruction.
- Capture in one steady pass. Move around the limb at a constant distance, keeping overlap between views. Spend extra time below the limb to cover the distal end, which is the area most often missed.
- Check before the patient leaves. Rotate the model on screen and look for holes, ridges, doubled surfaces and background clutter. Rescanning now costs a minute; rescanning after the patient has gone costs an appointment.
- Trim and export. Crop to just above the planned trim line with some margin, then export in a mesh format your CAD package imports.
This is the step where a phone app does the work. MagiScan turns an iPhone or Android phone into a 3D scanner and measuring tool, so you can capture the limb, check lengths on the model against your tape measurements, and export the scan for 3D printing or design. If you are unsure which sensor on your phone to use for close-range body work, see LiDAR vs TrueDepth camera for 3D scanning on iPhone. For general technique on scanning people, this guide to scanning a person or face covers posture and movement in more detail.
Why do limb scans come out wrong, and how do you fix them?
Most failed scans fall into a handful of patterns.
Motion. Patients shift weight, breathe and twitch. The software tries to merge two slightly different positions and produces ridges or a double wall. Support the limb fully, keep the pass short and ask the patient to stay still only for the capture itself.
Soft tissue sag. A residual limb is not rigid. Gravity pulls tissue differently when seated, standing or lying down. A scan taken in a new position will not match last month's scan even if nothing has changed clinically. Consistent positioning is the fix.
Volume change. Limb volume shifts over the day and, especially in the months after amputation, from week to week. Note the time of the scan and how long the patient has been out of the prosthesis. Comparing scans from different visits shows trends a tape measure misses.
Auto-filled holes. When the distal end is missing, many apps close the gap automatically with a smooth patch. That patch is a guess. It may be flatter or rounder than the real limb, and distal contact is exactly where a socket fit problem shows up. Rescan rather than trust a large automatic fill.
Reflective or dark surfaces. Shiny liners and very dark socks return poor data. A matte, light sock solves most of this.
Scale errors. Camera-only reconstruction can come out uniformly too large or too small. Always check at least one known measurement, such as a circumference or a length between landmarks, against the model before sending it on.
Phone app, dedicated scanner or plaster cast: which should you use?
The right tool depends on where you scan, how often, and how much tissue shaping you want in the capture. For a broader take on this decision, see do I need a 3D scanner or is a phone app enough.
| Option | How it captures | Strengths | Limits | Suits |
|---|---|---|---|---|
| Phone app (MagiScan) | Phone camera and depth sensor reconstruct the limb as a mesh | Hardware you already carry, quick to use at home visits or remote clinics, built-in measuring and export | Sensitive to motion, lighting and shiny surfaces; results depend on technique | Screening, home visits, monitoring volume between visits, clinics starting a digital workflow |
| Dedicated handheld scanner | Purpose-built structured-light or similar scanner, usually tethered to a laptop | Designed for repeatable capture, tight integration with clinical software | Separate hardware to buy, maintain and carry | High-volume clinics scanning every patient directly |
| Plaster cast, then scanned | Clinician shapes tissue by hand while the cast sets, then the cast is digitised | Hand-applied tissue loading is captured in the shape; familiar to experienced prosthetists | Messier, slower, extra consumables and a physical object to store | Complex limbs or practitioners who want hands-on shaping before going digital |
Many clinics mix these: casting for difficult cases, direct scanning for routine ones, and phone scans for follow-up checks. For a look at which app developers actually build for clinical fields, see mobile 3D scanning apps for medical, orthotics and logistics.
What happens to the scan after you capture it?
The exported mesh goes into O&P CAD, where the prosthetist or technician aligns it, applies a template or manual rectifications over landmarks, sets the trim lines and adds wall thickness. The output is a socket model ready for fabrication, either by carving a positive for traditional lamination or by 3D printing.
Printing is attractive for check sockets because iteration is cheap. The FDA's guidance on additive manufacturing notes that it allows manufacturers to rapidly produce alternative designs without retooling and to create complex devices built as a single piece. In practice, that means a second or third check socket after a fitting costs a print job, not a new mold.
A definitive socket has to carry the patient's full load, so strength matters as much as shape. Lower-limb socket strength is commonly assessed following ISO 10328, which tests sockets under maximum loading conditions simulating heel-strike or toe-off. The same study investigated coating printed sockets with different reinforcement materials, which shows that print material and post-processing are active design questions, not settled ones.
Regulation also applies. In the United States, the FDA's Center for Devices and Radiological Health regulates medical devices, including 3D-printed ones, based on risk, and regulates the manufacturing process and output rather than the printers themselves. The FDA keeps its additive manufacturing guidance on its 3D printing of medical devices page; the guidance represents the agency's current, non-binding thinking. If you fabricate sockets in-house, check what applies in your jurisdiction before you print anything a patient will walk on.
What should you do next?
Start by standardising capture before you change anything else. Write down your sock type, landmark set, patient position and lighting, and scan every patient the same way. Run a few cases in parallel with your existing method and compare the CAD models with your casts and tape measurements. That comparison tells you more about whether direct scanning works for your patients than any specification sheet.
If you want a low-cost way to try direct limb scanning, monitor volume between visits or capture limbs away from the clinic, MagiScan on a phone you already own is a practical starting point. Keep the clinical rectification, check-socket fitting and strength testing exactly as rigorous as before; the scan only makes the first step faster and repeatable.
Frequently Asked Questions
Can a 3D scan completely replace plaster casting for prosthetic sockets?
For many routine cases, yes: a direct scan gives the designer the limb shape, and rectification happens in CAD instead of on plaster. Some practitioners still cast complex or very soft limbs because hand shaping captures tissue loading that an unloaded scan does not. Many clinics use both, choosing per patient.
What file format should I export a limb scan in?
Export a mesh format your O&P CAD package imports; STL and OBJ are the common choices, and OBJ can carry the texture that shows your landmark markings. Check your design software's import options before your first patient scan rather than after.
Are 3D-printed prosthetic sockets regulated?
In the United States, the FDA regulates 3D-printed medical devices based on risk and focuses on the manufacturing process and output, not on the printer itself. Socket strength is commonly assessed against ISO 10328. Rules differ between countries, so confirm local requirements before fabricating definitive sockets in-house.
How often should a residual limb be rescanned?
Rescan whenever fit complaints appear, at each planned follow-up, and more frequently in the months after amputation when volume changes fastest. Scanning in the same position and at a similar time of day makes successive scans comparable, so you can see real volume change rather than positioning noise.